festively made

Make every day a celebration!

  • About
  • Recipes
  • Events
  • Projects
  • Family
  • Finds
You are here: Festively Made » Recipes » Page 2

Pulled from the Recipe Box: Southwest Pebble Salad

June 23, 2014 By Elizabeth Leave a Comment

Sothwest Pebble Salad | Festively Made
Growing up, it seemed like everything in my family centered around food. For instance, all holidays were geared around big elaborate meals. I always wanted to know when my next meal was. And, my mother, who is a wonderful cook and party hostess, always let me “assist” her in the kitchen. Now that I have my own kids, I’m not sure how much help I was to her at the time, but I thank her for allowing me to work alongside her. It really did instill in me a love of cooking and entertaining. As an avid reader, I also loved perusing my mother’s cooking magazines that arrived in the mail every month. I read them cover to cover, sometimes flagging a recipe that I wanted to make. Bless my mother’s heart for actually letting me make some of them, despite their complexity for a girl my age at the time.

Southwest Pebble Salad | Festively Made
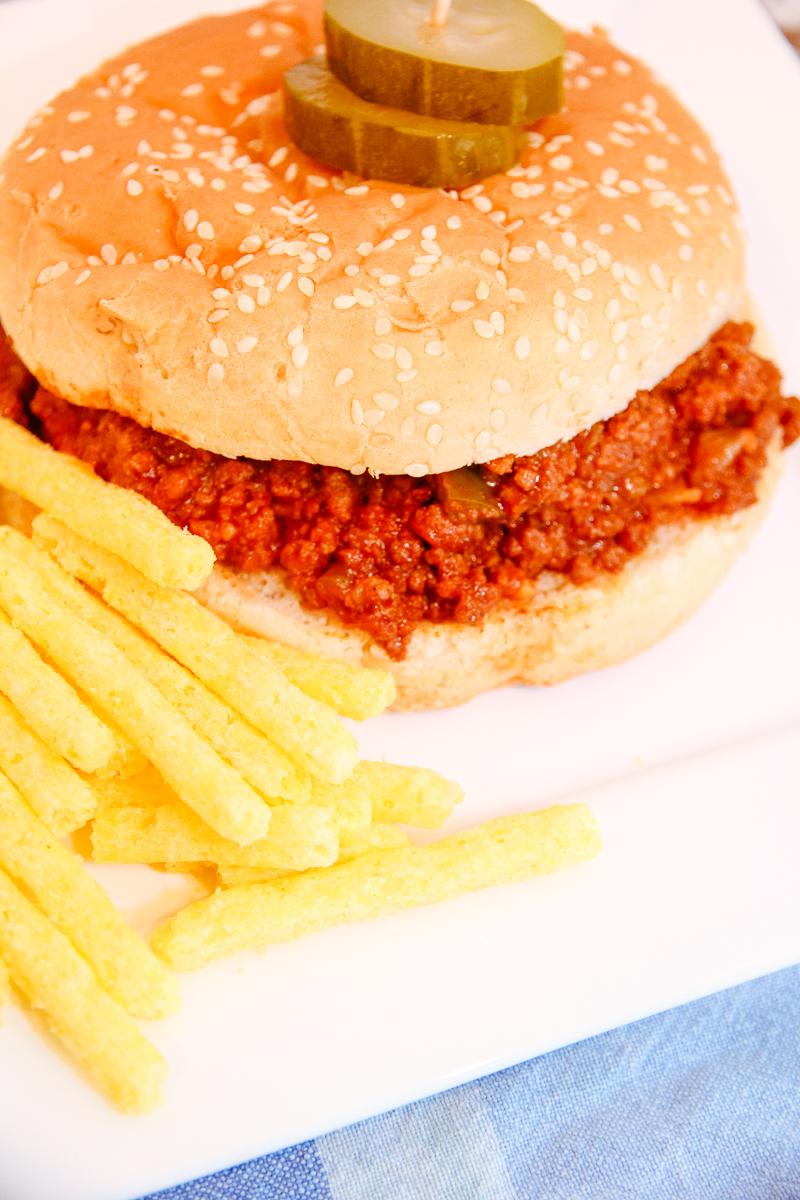
Confession time…Around the age of 10, I started cutting recipes out of my mom’s magazines (shhh! don’t tell!) and the weekly cooking section of our local newspaper. How’s that for a fun, youthful hobby?!! I collected them in a metal box, and that box has traveled with me to every place I have lived since. Recently, I decided to look through the box, thinking it might be cool to make some recipes that I deemed worthy of keeping oh so many years ago. Let me tell you, the recipe box was a trip. It was a VERY interesting mix of recipes. I was astounded by the number of fish recipes in there as I’m not personally a huge fan of fish. For whom did I cut out all of these fish recipes?!!

Southwest Pebble Salad | Festively Made
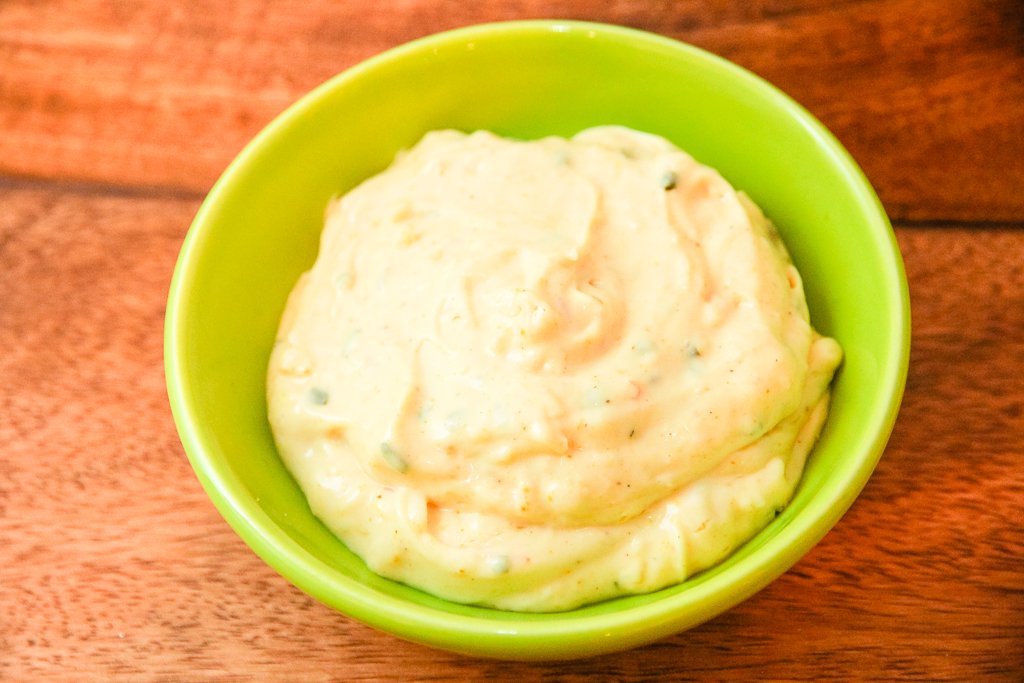
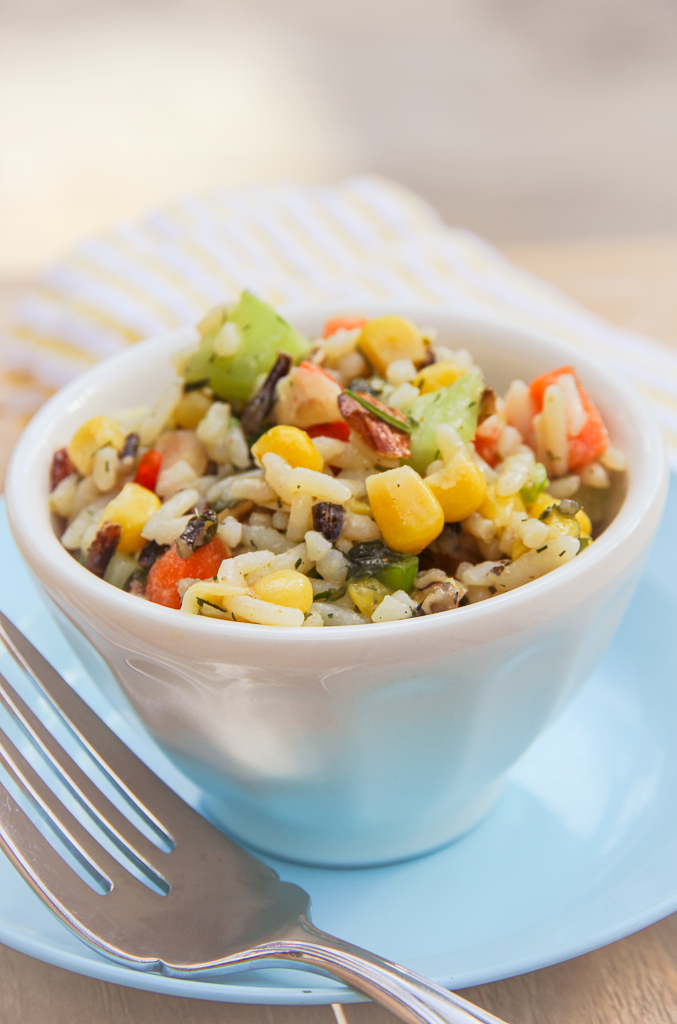
Today, I’m sharing one of the recipes I pulled from the box. It’s called Southwest Pebble Salad. Printed in the May 19, 1993 edition of the Austin American-Statesman, the recipe note states this recipe is a reprint from its 1992 Christmas Cookin’ Contest courtesy of Deirdre Lee. Apparently, Deirdre’s salad was a pretty popular finalist in the contest. I would say it’s the perfect summer salad. It’s light and bursting with yummy pebbles of goodness…veggies and nuts. I could see taking it up a level with some additional pebbles like cheese and dried fruit. I tasted the dressing before I poured it into the salad, and I was like yeah, not loving this completely. That said, it did something wonderful when mixed into the salad and allowed to chill for a few hours. The flavors melded with everything else in the salad, and it was pretty tasty. I’m so glad I pulled it out of the recipe box to try. Hope you enjoy it, too!

Southwest Pebble Salad

Print recipe
  • Print with main photo
  • Print text only
Southwest Pebble Salad
Serves 8
Allergy Tree Nuts
Dietary Vegan, Vegetarian
Meal type Salad
From magazine Austin American-Statesman

Ingredients

  • 1 6-oz package of long-grain and wild rice mix
  • 1 can Mexicorn (11 oz, drained)
  • 1 cucumber (seeded and chopped in small pieces)
  • 2 carrots (scraped and coarsely chopped)
  • 2 green onions (with tops, thinly sliced)
  • 1/2 cup fresh cilantro (chopped)
  • 1/3 cup olive oil
  • 1/4 cup lemon juice
  • 2 cloves garlic (minced)
  • 1/2 teaspoon dill weed (heaping)
  • 1/4 teaspoon dry mustard (rounded)
  • 1/3 cup pine nuts (lightly roasted, or substitute sliced or slivered almonds)
  • 1/2 cup sunflower seeds (dry roasted)

Directions

Step 1
Prepare long-grain and wild rice mix according to package directions. Let cool in large bowl.
Step 2
Stir in corn, cucumber, carrots, green onions, and cilantro into rice.
Step 3
Combine oil, lemon juice, dill weed, mustard, and pepper in a small bowl. Mix well. Stir into rice mixture.
Step 4
Cover and chill several hours or overnight. Stir in sunflowers seeds and pine nuts prior to serving.

Filed Under: Blog, Recipes Tagged With: Found in the Recipe Box, Salad

Even if You Say You Hate Curry, You Will Love This Curry Dip!

June 16, 2014 By Elizabeth Leave a Comment

Curry Dip | Festively Made
Here’s the thing…I love, LOVE, love dips. I’m a little of the mindset that it’s not a party unless you have dip. (Coincidentally, I feel the same way about cheese, but I digress…this is a post about dip!)

When I’m having a bunch of people over, we must have dips. Yes, as in dips plural. I like experimenting with new dips all of the time, but this curry dip, it’s a classic. In fact, it’s an old classic courtesy of my mother who first clipped this recipe out of a magazine as a young wife. I have a copy of the clipping, but no identifying information. When I grilled my mother as to its pedigree, she couldn’t remember which magazine she clipped it from, although she thought it was a women’s magazine like Good Housekeeping. It’s safe to say this curry dip recipe is at least 45 years old. If anyone knows where it was originally printed, let me know and I will update it accordingly with its original source. I did not come up with this tasty goodness on my own, but I’m doing my part to pay it forward. You’re welcome!

Curry Dip | Festively Made
This curry dip recipe is one of those recipes. You know the kind that everybody asks for after they’ve consumed the entire bowl (and maybe even licked it clean). And if I’m being honest, I usually double this recipe every time I make it for an event so that I can put some aside for myself to eat later in the week. It’s that addictive!

Curry Dip | Festively Made
Go ahead and throw some extra chives on top if you’re feeling fancy!

You may be saying to yourself, “I don’t like curry.” Well, I can tell you that everybody likes this dip, even curry haters. Take some crunchy vegetables and dig right in. I promise you won’t be disappointed.

Curry Dip

Print recipe
Serves 8
Prep time 10 minutes
Allergy Egg
Meal type Appetizer, Condiment, Snack
Misc Serve Cold

Ingredients

  • 1 cup mayonnaise
  • 2 teaspoons tarragon vinegar
  • dash pepper
  • 1/2 teaspoon salt
  • 1/8 teaspoon thyme
  • 1/2 teaspoon curry
  • 2 teaspoons chili sauce
  • 2 teaspoons chives (snipped)
  • 2 tablespoons onion (grated)

Directions

Step 1
In small bowl, mix all ingredients and refrigerate for at least 1/2 hour prior to serving.

Note

This dip tastes best if you make it the night before you plan to serve it. The flavors just get better over time!


Recipe from Festively Made. All images and content are copyright protected. Please do not use my images without prior permission. If you want to republish this recipe, please rewrite the recipe in your own words, or simply link back to this post for the recipe.

Filed Under: Blog, Recipes

Paleo Granola Packs a Grain-Free Punch!

June 13, 2014 By Elizabeth Leave a Comment

Paleo Granola | Festively Made
I don’t follow any special or trendy diets currently, unless you call attempting to eat healthily and trying to avoid processed food as much as possible a fad. That said, that hasn’t always been the case. For example, there was my year-long foray into vegetarianism during my sophomore year of college that was prompted by watching an episode of Julia Childs’ cooking show featuring an entirely vegetarian menu (no lie!). I wasn’t worried so much about saving the animals as I thought this would be a healthier way of eating. I was running about 30 miles a week at the time, and it seemed like a good idea (much to my mother’s dismay). Despite eating what I thought was a well-rounded vegetarian diet, I wound up severely anemic. Well, so much for being and feeling healthy! I felt like crap. My doctor promptly put me on prescription-strength iron pills. That and adding meat back into my diet, and what do you know? I began to feel amazing again.

Paleo Granola | Festively Made
There was also the time my best friend and I decided to go vegan for a week after she watched an Oprah episode about the topic. Having been vegetarian years ago, I knew I could go without meat. What’s a few more items off the menu? Well, we survived the week, but I can tell you being a vegan is not for me. I can live without meat, but I can’t live without cheese! There is no vegan substitute that comes even close (at least not that I’ve tasted) to replacing real dairy cheese.

Paleo Granola | Festively Made
Recently, I toyed with the idea of a Paleo or grain-free diet, thinking I may be suffering from wheat belly (that’s too much late night Googling for you!). I did go gluten-free for a few weeks, and I don’t believe it’s a bad way to eat. I just didn’t see any significant difference in my so-called wheat belly. I did try out some new recipes during that time, and this Paleo Granola is a keeper, even if the Paleo diet wasn’t. I found it on Sheridan French’s former blog, the Southern Eclectic and adapted it a little to fit my taste. If you’ve never had Paleo Granola, well, it rocks. Seriously. You won’t miss the grains, especially if you love nuts. It’s great by the handful atop some yogurt. Throw some fresh berries in there and have a parfait. Or, eat it by the bowl with some milk. You won’t be disappointed.

Paleo Granola | Festively Made

Paleo Granola

Print recipe
  • Print with main photo
  • Print text only
Paleo Granola
Prep time 10 minutes
Cook time 30 minutes
Total time 40 minutes
Allergy Peanuts, Tree Nuts
Dietary Gluten Free
Meal type Breakfast, Snack
Website The Southern Eclectic

Ingredients

  • 5 cups nuts and seeds (like walnuts, pecans, almonds, flax, chia, sunflower, cashews, pepitas, etc.)
  • 1/3 cup honey
  • 1/3 cup coconut oil
  • 2 teaspoons vanilla
  • 2 teaspoons cinnamon
  • 1 teaspoon nutmeg
  • 1 cup dried fruit (chopped or whole if small like cranberries, cherries, mango, blueberries, etc.)
  • 1 cup unsweetened shredded coconut

Directions

Step 1
Preheat oven to 300 degrees. Put honey, oil, vanilla, cinnamon, and nutmeg in a small pot and bring to a boil, stirring to mix ingredients completely (I like to use a small whisk). Once boiling, turn off heat and let cool slightly.
Step 2
Spread nuts and coconut on a baking sheet and pour honey mixture over it all. Use a spoon and mix it to distribute all the liquid. Spread granola out evenly to bake.
Step 3
Bake for 30 minutes. Watch carefully near end so it does not burn. Let cool and mix in dried fruit.
Step 4
Store in sealed container at room temperature.

Filed Under: Blog, Recipes

Break Out the Crockpot for Sloppy Joes

June 9, 2014 By Elizabeth Leave a Comment

Crockpot Sloppy Joes | Festively Made
I recently bought the Hamiltion Beach IntelliTime 6 Quart Slow Cooker to replace the crockpot I got as a wedding gift. I can’t believe how much crockpots have improved since I got married. I’m especially loving that it will automatically switch from the cooking cycle to a keep warm one when the cooking time is complete. I don’t have to worry about being around when my food is finished cooking. As a result, I find myself using the crockpot a lot more than I did in the past. I wanted to make sloppy joes because, well, I like a good sloppy joe. The husband likes a good sloppy joe. I trolled the Internet looking for a decent recipe (and there are many!), but I wasn’t in love with any of them. I decided to concoct my own version, and the results were pretty damn good if I do say so myself. I asked my husband how he liked it, and he said, “I’m on my third serving if that means anything.” And there you have it. If you knew my husband, you would know that was high praise.

Crockpot Sloppy Joes | Festively Made
This sloppy joe recipe is a little more involved than my favorite kind of crockpot recipe. You know the kind…dump everything into the crockpot and turn it on. That said, it’s worth the extra effort. Serve on a toasted bun and enjoy!

Crockpot Sloppy Joes

Print recipe
  • Print with main photo
  • Print text only
Crockpot Sloppy Joes
Serves 8
Prep time 25 minutes
Cook time 4 hours
Total time 4 hours, 25 minutes
Meal type Main Dish
Misc Serve Hot

Ingredients

  • 2 tablespoons olive oil
  • 3 1/2lb ground beef
  • 2 teaspoons garlic (minced)
  • 1 onion (chopped, approximately 2 cups)
  • 1/2 cup green bell pepper (chopped)
  • 1/2 cup red bell pepper (chopped)
  • 2 tablespoons worcestershire sauce
  • 2 cups ketchup
  • 1 can tomato sauce (15 oz)
  • 2 tablespoons vinegar
  • 1 1/2 teaspoon salt
  • 1/2 teaspoon pepper
  • 3 tablespoons brown sugar
  • 2 tablespoons dry mustard
  • 1 tablespoon chili powder
  • 1 tablespoon cumin
  • 1/2 teaspoon paprika

Directions

Step 1
Saute beef in 1 TBS of olive oil until brown. Drain fat and set aside.
Step 2
Saute onions and peppers in remaining olive oil until tender, adding minced garlic to mixture near end of cooking. Do not cook garlic longer than a minute or it may burn. Remove from heat.
Step 3
Put veggies and meat into crockpot. Add remaining ingredients and stir to combine thoroughly.
Step 4
Cook on low heat for 4-6 hours and stir occasionally.

Note

Serve on a toasted bun and enjoy!

Recipe from Festively Made. All images and content are copyright protected. Please do not use my images without prior permission. If you want to republish this recipe, please rewrite the recipe in your own words, or simply link back to this post for the recipe.

Filed Under: Blog, Recipes

To Die for Tri-Berry Muffins

June 4, 2014 By Elizabeth Leave a Comment

Tri-Berry Muffins | Festively Made
Having hit the trifecta of berries (strawberries, blueberries, and blackberries) from our recent berry picking adventure, I decided to make some muffins. The Barefoot Contessa, Ina Garten, created pretty much the best tri-berry muffin recipe ever made. You can find it in this cookbook. Seriously. It’s GOOD. Her recipe calls for a mix of strawberries, raspberries, and blueberries so I adapted it ever so slightly to accommodate our haul from Blessington Farms.

Tri-Berry Muffins | Festively Made
The best part about these muffins is that you don’t mix the sugar in until the end. This does something magical to the muffins. The sugar makes the top a little bit crunchy. Really, it’s to die for! I think the next time I make these tri-berry muffins, I will throw in some chocolate chips, too. That might just take them over the top if that’s even possible.

Tri-Berry Muffins | Festively Made
Can you see all that crispy, sugary deliciousness? Another critical part of this tri-berry muffin recipe is that you mix everything by hand. And even then, you mix it as little as humanly possible. You know just until it’s combined. This keeps the muffins nice and tender. Too much mixing will overwork the batter, and your muffins won’t be as divine. Really resist that urge to over mix them. You will thank me later. Even if the batter is lumpy, resist the urge. Don’t do it! Everything is going to be ok. Trust me on this.

Tri-Berry Muffins | Festively Made
Straight out of the oven, I threw a little pat of butter on my tri-berry muffin because I like it that way.

Tri-Berry Muffins | Festively Made
What can I say? Yum. Just yum.

Tri-Berry Muffins

Print recipe
  • Print with main photo
  • Print text only
Tri-Berry Muffins
Serves 18
Prep time 15 minutes
Cook time 25 minutes
Total time 40 minutes
Allergy Egg, Milk, Wheat
Meal type Bread, Breakfast
Misc Child Friendly, Freezable
From book Adapted from Barefoot Contessa at Home: Everyday Recipes You'll Make Over and Over Again

Ingredients

  • 3 cups flour
  • 1 tablespoon baking powder
  • 1/2 teaspoon baking soda
  • 1/2 teaspoon salt
  • 1 1/2 teaspoon cinnamon
  • 1 1/4 cup milk
  • 2 eggs (slightly beaten)
  • 1 cup butter (melted)
  • 1 cup blueberries (fresh or frozen)
  • 1/2 cup blackberries (fresh or frozen)
  • 1/2 cup strawberries (fresh or frozen, diced)
  • 1 1/2 cup sugar

Directions

Step 1
Preheat oven to 375 degrees. Line muffin tins with paper liners.
Step 2
Sift flour, baking powder, baking soda, salt, and cinnamon together in a large bowl. Stir by hand to be sure the ingredients are combined. In another bowl, combine the milk, eggs, and melted butter. Remember mix everything by hand. Do NOT use a mixer.
Step 3
Make a well in the middle of the dry mixture. Pour the wet mixture into the well and stir until just combined. There will be some lumps, but don't over mix the batter. Add the blueberries, blackberries, strawberries, and sugar, and stir in gently to combine.
Step 4
Using a large spoon or scoop, spoon batter into the muffin cups to fill the liners. Bake for 20 to 25 minutes, until a cake tester comes out clean and the tops are nicely browned.

Filed Under: Blog, Recipes

Mommy’s Cherrylicious Smoothie

June 2, 2014 By Elizabeth Leave a Comment

Mommy's Cherrylicious Smoothie | Festively Made
Both of my children have had their own unique challenges with food from a very young age (which is definitely a topic for another day!). Weight-wise, my son likes to circle the drain on the growth chart. I joke that his favorite food is air because he has zero interest in eating. It’s a struggle to get any kind of food into him, and he’s more likely to drink his calories rather than eat them. I created this smoothie recipe as a healthier, real food alternative to the Ensure drinks he loved to guzzle.

Mommy's Cherrylicious Smoothie | Festively Made
When I decided to start making my son smoothies, I bought a Blendtec Designer Series Blender. It makes whipping up smoothies a breeze. I definitely recommend a high quality blender if you are planning to make lots of smoothies. This recipe is very forgiving, too. You can substitute any type of fruit and juice you like or have on hand. I use whole milk yogurt because he needs the calories, but any type of yogurt will work. This particular combination gets my son’s seal of approval and also earned the moniker Mommy’s Cherrylicous Smoothie.

Mommy's Cherrylicious Smoothie | Festively Made
Note: This recipe makes two very large servings (I use 20-oz cups) so it can be broken down into smaller portions if you like. My son usually has one smoothie for breakfast, and I put the other smoothie in the refrigerator for him to drink later after school. It’s less work (and blender washing!) for me. Just shake or stir the refrigerated smoothie if you have any settling. I promise it tastes just as good! Smoothies can also be frozen into individual servings to be used later. Sometimes, I pack a frozen smoothie in my son’s lunch. It keeps the food cold and is usually thawed by lunchtime.

Hope you enjoy!

Mommy’s Cherrylicious Smoothie

Print recipe
  • Print with main photo
  • Print text only
Mommy’s Cherrylicious Smoothie
Serves 2
Prep time 5 minutes
Cook time 1 minute
Total time 6 minutes
Allergy Milk
Dietary Gluten Free, Vegetarian
Meal type Beverage
Misc Child Friendly, Freezable, Serve Cold
A yummy and healthy cherry smoothie

Ingredients

  • 1 cup orange-carrot juice (I used Trader Joe's Omega 3 Carrot-Orange)
  • 1 cup vanilla yogurt
  • 1/2 cup cherries (frozen or fresh)
  • 1/4 cup pineapple (frozen)
  • 1/4 cup mango (frozen)
  • 1/4 cup peaches (frozen)
  • 1 banana (frozen or fresh)

Optional

  • sweetener (to taste, I used agave)

Directions

Step 1
Add all ingredients to a blender in the order listed in the recipe (liquid first). Blend and serve.

Note

Recipe from Festively Made. All images and content are copyright protected. Please do not use my images without prior permission. If you want to republish this recipe, please rewrite the recipe in your own words, or simply link back to this post for the recipe.

Filed Under: Blog, Recipes

« Previous Page
  • Email
  • Pinterest
  • Twitter

Hey y’all!

Writer. Wife. Mom x 2. Southern girl. Fearless cook. Over-the-top party planner. Amateur photographer. Read More…

Follow on Bloglovin

Copyright © 2025 · Graceful theme by Restored 316

Copyright @ 2014 Festively Made